
The Linksys Velop system sticks out in the fast-paced world of networking as a dependable and potent option for dependable connectivity in homes and workplaces. Even the most reliable systems can have problems, though, and resetting a Velop node is a typical first step in troubleshooting. We will go into the art of resetting a Linksys Velop node in this extensive guide, making sure that users can accomplish the task quickly and easily.
Recognising the Need for a Change:
It’s important to comprehend the reasons why resetting a Velop node can be required before beginning the stages. Resetting a network is frequently necessary to address problems including poor performance, unstable connectivity, or the need to reconfigure the network. This procedure can assist in resolving conflicts, removing obsolete configurations, and returning the system to its initial configuration.
Determine the Issue
Prior to jumping right into a reset, you should determine the exact problem you are experiencing. Is there an issue with every node, or is it just with that one? Comprehending the extent of the issue will direct your troubleshooting procedure and ascertain whether or not a reset is actually required.
Make a backup of your settings.
All of the current configurations, including device prioritisation and Wi-Fi settings, will be removed when a Velop node is reset. It’s a good idea to backup your settings to prevent the headache of having to reconfigure your network from scratchTo ensure a smooth restoration procedure down the road, save the configuration file to a safe location.
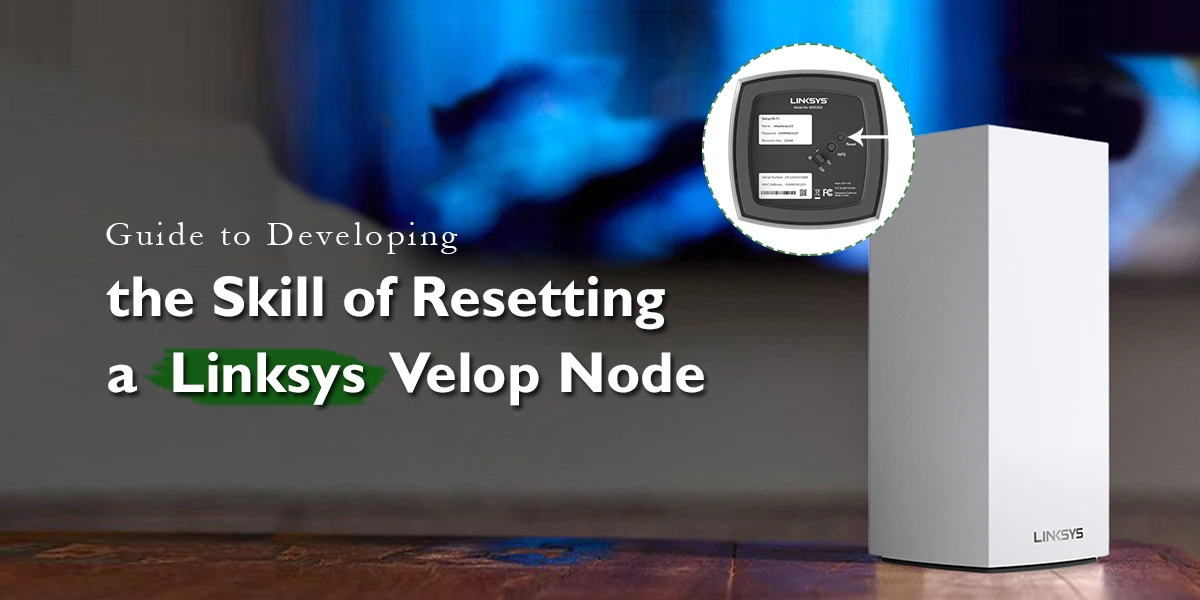
Resetting the Node directly
Find the Linksys Velop node’s reset button. Usually, this button is recessed to avoid unintentional resets. To push and hold the reset button for around ten seconds, you might require a paperclip or other comparable item. The node’s LED indicator will begin to flicker, signalling the commencement of the reset procedure.
Await the completion of the reset.
Once you’ve hit the reset button, be patient. It usually takes a few minutes to reset. Permit the node to initialise and reboot. The node is currently in its default state, as indicated by the LED indication stabilising.
Reestablish contact and restore
Use the Linksys app or online interface to rejoin the Velop node to the network when the reset is finished. This is when it really helps to have a backup of your settings. To restore your customised network settings, including Wi-Fi names and passwords, upload the configuration file that you previously saved.
Keep an eye on and test
Check the functionality of your network after the reset and restoration procedure. Verify whether connectivity, speed, and general stability have improved. Make that all linked devices are operating properly and do speed tests. This step will assist in verifying that the reset has effectively resolved the problems you were experiencing.
Final thoughts
Anyone overseeing a Velop mesh network will find it beneficial to learn how to reset a Linksys Velop node. Users may confidently manage the procedure, resolving connectivity difficulties and optimising their network for optimal performance, by adhering to this detailed guidance. Recall that a well-conducted reset can revitalise your Velop system and give all linked devices a dependable and smooth networking experience.